If you can't do a push-up yet, you're far from alone, and the fix is simpler than it looks. A push-up has your arms pressing a large share of your body weight, so the trick is to start at an angle that takes some of that weight off, then make the angle harder a little at a time.
Here are the steps from the wall to the floor, the form cues, a three-day weekly plan and clear rules for when to move on.
Why push-ups are worth learning
The CDC counts exercises that use your body weight for resistance, such as push-ups, as muscle-strengthening activity. It suggests 8–12 repetitions per set, done to the point where it's hard to do another rep without help.1
Push-ups can also do the same job as the bench press. In an 8-week study, young men trained twice a week with either the bench press at 40% of their maximum or push-ups adjusted to the same load, for example by doing them from the knees. Both groups got stronger and built similar amounts of chest and triceps muscle.2 In another study, moderately trained men did progressively harder push-up variations three days a week for four weeks, and their bench press maximum went up, as it did for a group that trained on the bench press itself.3
Push-up ability may also say something about your overall fitness. In a 10-year study of 1,104 male firefighters, those who could do more than 40 push-ups at the start had a much lower rate of cardiovascular events than those who could do fewer than 10.4 That's an association in one group of active men, not proof that push-ups protect your heart, but the authors suggest that push-up capacity may be a simple, free way to gauge fitness.
Why the angle changes everything
How hard a push-up is depends on how much of your weight goes through your hands. A force-plate study of 23 recreationally fit men and women measured it. Push-ups with the hands raised on a box, and push-ups from the knees, put less force through the hands than a regular push-up, while raising the feet on a box put more. Men and women responded the same way.5
So you can start with your hands high enough to make the push-up manageable, then lower them step by step until you reach the floor.
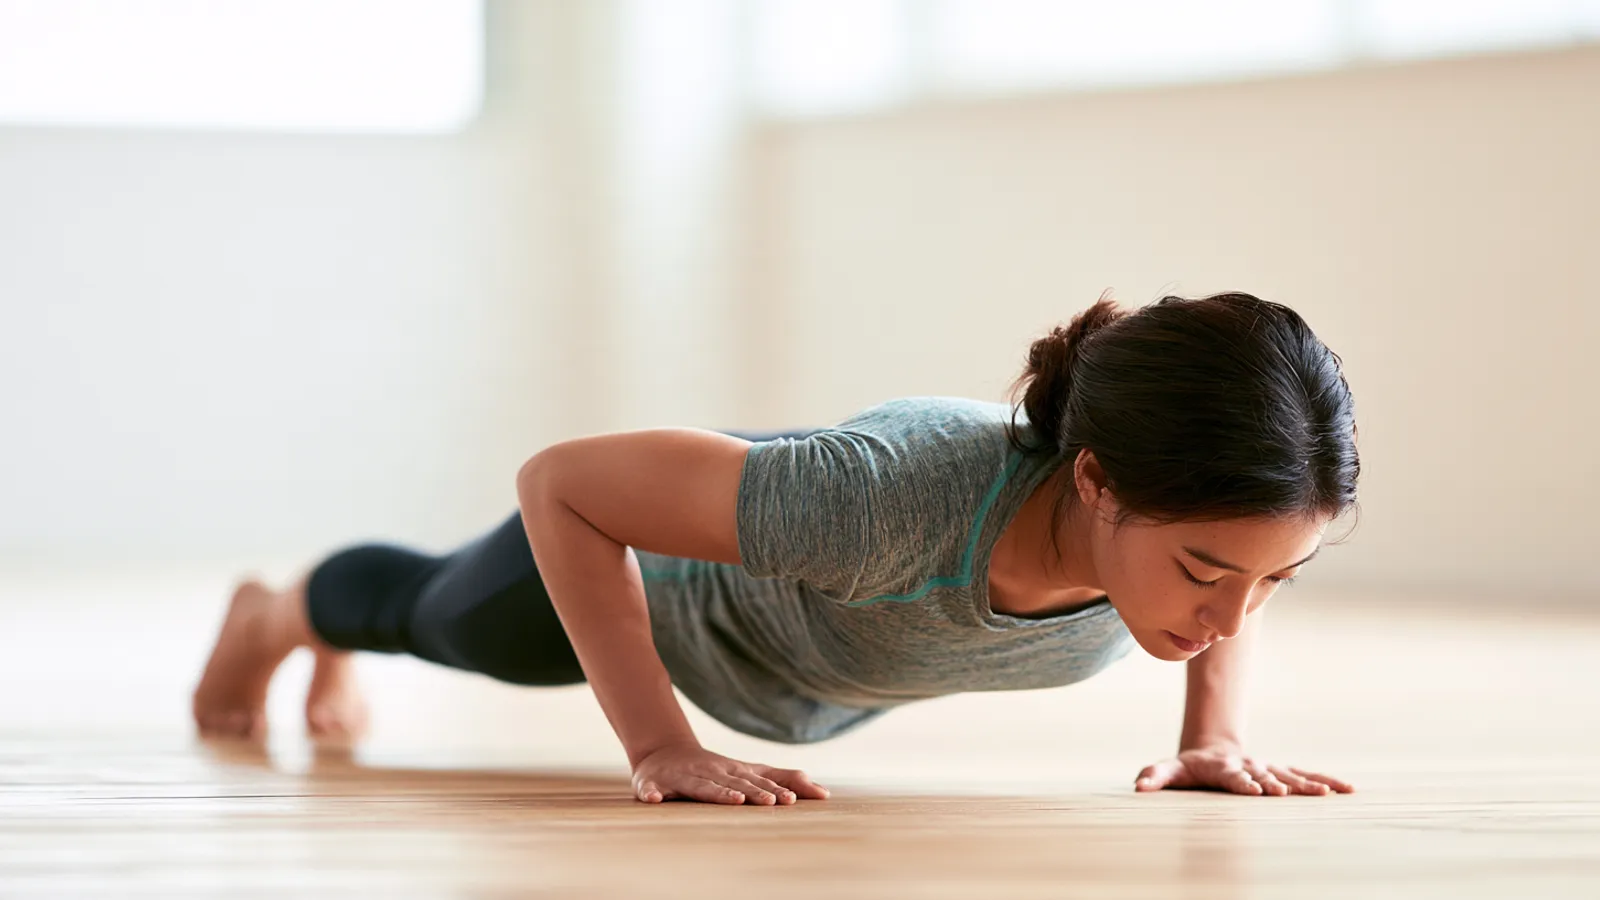
How to do a push-up correctly
These cues apply to every step below:
- Hands: slightly wider than your shoulders, fingers pointing forward.
- Body: one straight line from head to heels (or head to knees on knee push-ups). Tighten your stomach and squeeze your glutes so your hips don't sag or stick up.
- Elbows: angled back diagonally as you lower, not flared straight out to the sides.
- Depth: lower until your chest almost touches the surface, then press back up until your arms are straight. Breathe out on the way up.
- Head: in line with your body, eyes on the floor just ahead of your hands.
A rep only counts when it's full range with a straight body.
The progression, step by step
Start at the hardest step where you can do 8 good reps. Most people combine two neighbouring steps in a session.
Step 1: Wall push-ups
Stand an arm's length from a wall with your hands flat against it at chest height. Bend your arms to bring your chest toward the wall, then push back. The NHS includes wall press-ups in its home strength routine, with 3 sets of 5–10 reps, building up gradually.6 To make them harder, step your feet a little further back.
Step 2: Incline push-ups
Put your hands on something lower: a kitchen counter, then a sturdy table, then a gym bench, then a low step. In a gym, a Smith machine bar works well because you can lower it one notch at a time. Whatever you use, check that it can't slide or tip. Watch the incline push-up demo.
Step 3: Knee push-ups
Kneel on a mat with your hands on the floor and keep a straight line from knees to head, with no bend at the hips. Knee push-ups are lighter than regular push-ups, like hand-raised push-ups are,5 and they're one of the adjustments the 8-week study used to match the push-up load to the bench press.2 Use knee push-ups or a low incline, whichever suits you.
Step 4: Negatives
Start at the top of a full push-up and lower yourself as slowly as you can, aiming for 3–5 seconds, until your chest is just above the floor. Drop your knees, push back up, and repeat. Do 3 sets of 3–5. This trains the full range before you can press up from the bottom.
Step 5: Your first full push-up
Test it once a week at the start of a session, when you're fresh. Once you get one, collect a few sets of 2–3 reps in each session and build from there toward 3 sets of 8–12. Compare your form with the push-up demo.
Scapular push-ups: a warm-up worth doing
In the top push-up position (or against a wall or bench), keep your arms straight and let your chest sink a few centimetres so your shoulder blades come together, then push the floor away so they spread apart. In a muscle-activity study, a push-up finished with that extra push at the top, the "push-up plus", activated the serratus anterior, a muscle that helps control your shoulder blades, more than versions done on the elbows, on the knees or against a wall.7 Do 2 sets of 8–10 as a warm-up.
Your weekly plan
The American College of Sports Medicine (ACSM) recommends training 2–3 days a week as a beginner, and making an exercise harder once you can do one or two reps more than your target.8 Plan three short sessions, such as Monday, Wednesday and Friday. Each takes 10–15 minutes:
- Warm-up: arm circles, then 2 × 8–10 scapular push-ups.
- Main sets: 3 × 8–12 at your current step, resting 1–2 minutes between sets.
- Extra (from Step 3 on): 3 × 3–5 negatives.
When to move on: once you can do 3 sets of 12 with good form, go to the next step, or lower your hands one notch, and build back up from 8 reps. How long that takes depends on where you start, so judge your progress by your numbers, not the calendar.
Can you do push-ups every day?
Hard sets need recovery, which is why the ACSM recommends 2–3 training days a week for beginners.8 On the days in between, keep any practice easy, a set or two well short of your limit, and back off if your shoulders, elbows or wrists ache.
After your first push-up
When 3 sets of 10 full push-ups feel comfortable, you can keep making them harder:
- Close-grip push-ups: hands closer than shoulder-width. In a study of 40 adults, a narrow hand position made the chest and triceps work harder than a wide one.9
- Decline push-ups: feet on a bench or step. In the force-plate study, feet-raised push-ups put more force through the hands than any other version tested.5
- Slow lowering: take 3 seconds to lower on every rep.
It's also a good time to take your strength into the gym. The 3-Day Full Body program builds on it with three kinds of bench press, alongside squats, rows and pull-ups. Push-ups also appear in the 5-Day Transformation, paired with the incline bench press on its chest day. For the pulling side, see your first pull-up.
Stay safe
- If you have a shoulder, elbow or wrist injury, or a health condition that affects exercise, check with a doctor or physiotherapist before you start.
- If your wrists ache on the floor, try doing push-ups with your hands on a pair of hex dumbbells (they don't roll) so your wrists stay straight.
- If a step causes pain, go back to the previous one. Pain that keeps coming back is worth getting checked.
- Muscle soreness for a day or two is normal when you start. Sharp or joint pain is not.
How to start this week
- Find your step: the hardest version where you can do 8 clean reps.
- Schedule three sessions with a rest day between them, and note your reps in the first one.
- Beat one number each week: more reps, or lower hands.
- Check your form against the animated incline, full, close-grip and decline push-up demos in the TrainSmart app.
Three short sessions a week, one step at a time, will take you from the wall to the floor.